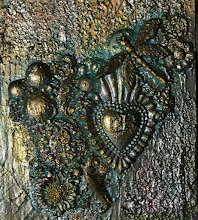
Instructions written by Donna Lanclos

2 mat or chip boards 3 5/8” X 4 1/2"
2 pieces patterned paper about an inch larger that the boards
2 pieces solid cardstock 3 3/8” X 4 ¼” to complete inside covers
Coordinating ribbon 16” long
Layer 1-7 pieces solid cardstock 3 5/8" X 9"
Layer 2-7 pieces solid cardstock 3 5/8" X 6 1/2"
Layer 3-7 pieces patterned paper 5 1/2" X 7 1/4"
Paper Trimmer
Bone Folder
Adhesive
 First Layer (Largest) Cut 7 pieces of cardstock 3 5/8” x 9”. Fold each piece to 3 5/8 x 4 ½. Set these aside.

Second Layer (Middle) Cut 7 pieces of cardstock 3 5/8 x 6 ½. Fold to 3 5/8 x 3 ¼. Set these aside.
Last Layer - Photos are labeled 1-4 above - (smallest) Cut 7 pieces of patterned paper 5 ½ x 7 1/4 1. Fold to 2 ¾ x 7 ¼. 2. Open and fold to 3 5/8 x 5 ½. 3. Open and refold to 2 ¾ x 7 ¼. Cut from the bottom corner up to the fold in the middle on both side. 4. Fold the pointed end up to form the pocket page.
If you did not use double sided patterned paper reserve the two triangles that you cut off, and adhere them to cover the white side when folded. Ink the edges to hide any misalignment.
To Assemble the Book:
Take 1 of the bottom/larger pieces and run adhesive along both of the short ends. Take 1 of the middle pieces and line the left short edge with the left short edge of the bottom piece. Then adhere the right short edge with the rights short edge of the bottom piece. Next, run adhesive along both of the short ends on the top of the middle layer. Take 1 of the top/shortest layers and line the left short edge up with the left short edge of the middle layer and adhere. Then adhere the right edge of the middle layer to the right edge of the top layer. Repeat with remaining 6 pieces.
 You now have 7 booklets with 3 layers each. Adhere the back of one booklet to the front of another booklet. Repeat with remaining booklets. Run a line of adhesive one all four edges of the top of the booklet. Adhere the top cover to the booklet. Repeat with the back cover. Make sure your ribbons are facing the open pages of the booklet and not the spine.
Your Star Album is now completed and should look something like this when opened.


This is a shot of my album filled with ATCs.
 Happy Scrappin, Hope you enjoy making one for yourself.


No comments:
Post a Comment