Pages

Showing posts with label ATC. Show all posts

Sunday, February 25, 2018

Green with Envy

Good Morning my follower crafters,  today I am up on the Gecko Galz' blog sharing another ATC I made for our fantastic February Challenge.  There is still plenty of time to join in if you dare!!!

Here is the finished Card.


The supplies you will need are as follows:
  1. Image from the Gecko Galz Visions in Green Digital Image Sheet
  2. Base card 
  3. patterned paper from my stash
  4. ranger distress in Black Soot 
  5. Wink of Stella in Clear
  6. flower, mardi gras masks, sequins, mardi gras mask charm and jeweled flower from my stash. 
The steps are as follows:
 1. Cut out your base ATC Card to the appropriate size.  If you are unfamiliar with ATC Cards, you can go here to see what all the hype is about.  As you base card don't forget you can use old playing cards, recycled cereal or other types of food packaging boxes.  You can also use the packaging cardboard from your scrapbook supplies.  These make a good heavy weight for your cards.  You can either round your edges like I did or leave them square.


2.  Cover the front of your card with a patterned paper of your choice.  I found a nice green swirly paper in my stash but you could use this if you don't have anything in your stash. Don't forget to put a complimentary solid piece of paper on the back so you can add your information. 


The easiest way to adhere your paper to your base is to use a sticker maker.  Once your papers are adhered to your base you can move on to step 3. 

3.  The next thing I did was to fussy cut my image from the Visions In Green digital image sheet by Gecko Galz.


After fussy cutting my image I inked the edges with black soot using a ranger foam applicator. 
I then added fun foam to the back of my image so that it would be pooped up.  


4.  I then adhered the hologram mardi gras masks that I had in my stash on top of the patterned paper


5.  I added my image on top of the masks and then added my embellishments.  I finished off by adding a touch of Wink of Stella clear to the flower and fur trim on the image.  I think it added such an elegant pop!!! 


Here is the finished ATC Card again.  


That's it, simple as 1,2,3.  Hope you will join us in playing along with our other customers and friends.  Tick Tock, Tick Tock, the clock is ticking.  You only have 4 days left!!! 

Happy Crafting!!!

Friday, January 12, 2018

ATC's for the Curious

So what exactly is an ATC  An ATC or Artist Trading Card is nothing more than an original piece of art made by an artist then traded to other artists like you would pokemon cards or the old fashion baseball cards.  This type of art is very fun because the cards can be made using any type of materials, media or techniques.   These cards are usually made as a one of a kind piece of art, but sometimes the artist will make a series of cards all with a similar theme.  These works of art are not usually sold but should be traded instead.  

There are a few rules where ATC Cards are concerned and they are as follows

  1. The ATC must measure 2.5 x 3.5 inches or the exact size of a playing card.
  2. An ATC is meant to be an original piece of ART not a photocopy or print.  Some groups allow digital works of art so it would be wise to check the swap requirements. 
  3. The cards must be traded for other cards—not sold.
  4. The cards should be flat enough to fit into a plastic trading card sleeve. 
  5. The artist should add their name, contact information, the title of your work and the date it was completed. 
So how do you make one of these beauties, well let me tell you!!

You begin by selecting a base for your card.  This could range from a cut up cereal box, to  watercolor paper, plain cardstock, canvas panel, playing cards, the cardboard you get in packaging.  After that you cut your base to the appropriate size.  Your artwork can be in a vertical or horizontal orientation. 

You would then need to decide what you will put on top of your base,  Here the possibilities are boundless.  You could cover it with a patterned paper, after adding gesso your base you could paint it, with either acrylics or watercolors, you could apply modeling paste through a stencil, you could use a rubber stamp with a glue base and emboss an image on top of your base.  Again, the possibilities are just about endless.  

After finishing your base card you can now begin the fun process of adding 2d and 3d items to your card.  These could include digital or photographed images, paper flowers, beads, sequins, glitter, ribbon, fabric trims, and small chipboard pieces.  Just remember that your work should fit in an ATC envelope or sleeve.

Once completed, you should definitely find a group of like minded people to trade your cards with.  If anyone would like to trade with me, I'm up for the challenge.  My only stipulation is that I can only do one a month.  So the first one to ask will be my partner. 

Here are some examples of my ATCs through the years 


Happy swapping my crafty peeps!!!


Tuesday, January 2, 2018

Gecko Glaz Courtly Love January Customer Challenge

It's time for a new Gecko Galz Customer Challenge!!

This month our Challenge theme is "Courtly Love"


Feel Free to grab our badge and share on your blogs.There is only one rule, and that is you need to use at least ONE product from Gecko Galz!! It can be one of the free products, stamps, collage images, or digital papers!! It is up to you!! The winner will receive a $25 Gecko Galz Shopping Spree!!!

Hmmm?

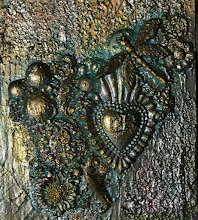
This ATC Card has a mixed media background also. Here I used masking tape that was wrinkled up and added to the card. Then the card was painted with heavy body white gesso. When dry I painted with Black Gesso. I then came back over the top with Art Alchemy's Wax in Vintage Silk. Think I went a bit over the top with the wax. I wanted more of the black showing, What do you think? I cut the Image from Gecko Galz Vintage Flirtations. The image was inked with brushed corduroy and added to the card. I then added some strung pearls and rosettes from my stash, the butterfly was also from my stash. then added the words.

For a list of other design team members who have created some beautiful artwork, please go to http://geckogalzscrapbooking.blogspot.com/ or Gecko Galz

We can't wait to see your creations!!

Thank you for visiting!

You have until 11:55 pm Eastern time on January 29th to play along!

You can link up your creations or send a photo of your project to us at geckogalz2014@gmail.com.

Sunday, March 31, 2013

New Projects


Happy Easter Everyone.  I have been super busy with the Retreat House and small projects, so busy I haven't had time to update my blog.  Soooo without further ado, I will share with you my latest projects.

This was one of 20 journal cards in the popular theme of Project Life.  The back of the card leaves space for journalling.  The background paper is one I purchased from Gecko Glaz

 The above is an ATC Card that I did for a small swapping group that I'm involved in call Keep Calm and Swap On.  There are 15 of us that swap monthly.  The group organizer assigns a theme each month.  The above was in conjunction with "Grandmother's Attic" Theme. 


 This 5x7 canvas was altered using modeling paste and paints.  I first laid the stencil down, spread the modeling past over the stencil and then removed the stencil.  I let the paste dry overnight then came back with several different colors of paint.  I blended the paints with a damp baby wipe.  I also used modeling paste around the vintage photo I purchased from Gecko Galz, in an effort to make it appear as part of the canvas.  I didn't quite get the technique down perfect but I'm still pleased with the outcome.  I added crackle paint over the photo and the surrounding areas to make the canvas appear older.  I then topped the entire canvas with vintage photo distress stain. 

 Here is another altered canvas, this one a 3x4 size.  I used another vintage photo.  I used washi tape (stamps) and a dusty attic border I had in my stash.  The chipboard heart, the fluer de lis, button flowers and jewelry piece were all found in my stash bin.  I love the background color.  That was just painted a beautiful aqua color and then distressed with Tim Holtz Distress stain. 

This post card was one that I created for a swap over on Alpha Stamps.  The vintage photo was one I found online using a google search.  The Greetings was cut using my cricut and I glued sand onto the bottom and inserted the shell buttons. 
 The above layout is one I did a couple of weeks ago.  I used Graphic 45 paper, the sun flowers were make using my cricut and different color seed beads for the center.  I added modeling paste and a stincle in the torn and distressed areas as well as one either side of the layout.  The title was cut using my Cricut. 

This is a close up one of the flower clusters. 

This is the left side cluster.  I cut burlap leaves using the Tim Holtz die.  I also used a prima flower and butterfly.  The ribbons were some from my stash. 
This layout is the total opposite of the one above and very out of my element.  I was just messing around in the studio one rainy afternoon and used up some old paper from my stash.  Haven't found photos for this one yet.

That's all I have for now, thanks for looking. 

Thursday, January 24, 2013

The New Year

Wow, I have finally slowed down enough to enter an update.  We had a very busy Holiday season.  My husband and I took an extended vacation during November, then December was busy with parties and family.  We had a wonderful holiday season filled with adventure, family and friends. 

I have been in a creative slump, I think its all the medicine that I have been taking for nerve pain associated with two surgeries in 2011.  Since the first of the year, I decided to try to break the creative barrier by trying my hand at a multi medium class by Christy Tomlinson.  I will post pictures as I finish each project. 

I have also been creating ATCs again.  I have joined a small group (15) that will create ATCs according to a monthly theme.  January's Theme was Mardi Gras. (Mail Me Something, Mister)   Here are a few of the cards that I have received and the one that I sent out. 


This is the one I created and used as a page in the mini book I made to hold all of the cards.  I'll post th mini in another post.